46 Spartan – Insulation

As the Spartan will be lined with plywood great care has been taken to avoid any potential water damage via leaks or condensation. We have glued one layer of insulation to the outer skin with a second layer across the ribs to give an air gap. The inner insulation has been taped and sealed to form a moisture barrier. 


47 Spartan – 1st fix wiring

Between the first and second layers of insulation we have fitted all the necessary wiring and cable conduits


46 Spartan – Preparation of the inner skin

The first job is to paint each panel internal face with a protective bituminous coating prior to fitting insulation

46 Spartan – Arrival at the Workshop
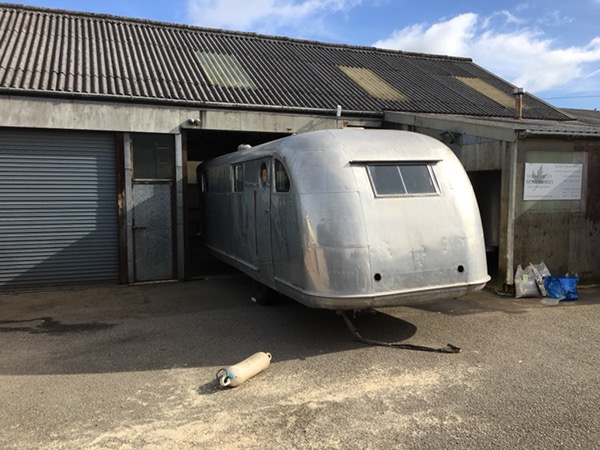
The very much anticipated arrival of a beautiful 26ft 1946 Spartan Manor – here for a complete interior.
This 71 year old trailer was originally lined in birch plywood with birch plywood cabinets.
The new interior will use the same materials and a layout similar to the original with a front sofa (the observation lounge), middle kitchen an dinette, bathroom and rear bed.


58 Globester – New Insulation and Floor

With the chassis repaired and painted we fitted cellotex insulation between the sections before laying a new waterproof phelonic plywood floor. The insulation is taped to prevent condensation problems and wooden battens have been set in to help with fixing. After the flooring is cut to size all edges are carefully sealed before securing to the chassis.
On the walls a roof the foil insulation has been carefully bonded to the skin with all edges sealed, again to avoid any condensation problems


58 Globester – Fridge Vent Repair

The original fridge vent was the source of a nasty leak and is no longer required. A previous repair actually had stuff growing underneath! After removing the vent and cleaning the area a replacement patch has been fitted with plenty of sealant and matching rivets and will be polished with the rest of the skin.


58 Globester – Chassis

The 60 year old chassis was in remarkably good condition with minimal welding repairs needed. After cleaning 2 coats of rust inhibiting paint are applied. A final sprayed coat of under seal will be applied before the floor goes down.


58 Globester – Inner panel repair

One of the segments in the rear end panel previously removed is scarred where some electrical fittings were previously located.
The segment is de-riveted and will need to be replaced. The new segment will be made from a piece of aluminium salvaged from another part of the inner skin (like a skin graft!) and will need to be rolled to form the curved profile.
58 Globester – Floor out, belly off

The the floor out and the belly pan removed the old airstream emits an eerie glow….
58 Globester – Inner Skin Removed

With the inner skin the original insulation is revealed, mouse ridden and damp. Interestingly a 60 year old shortcut can be seen here. The insulation was missing from all four top corners, presumably because it was fiddly to fit!